Exporting test results is a crucial step for organizations and administrators who need to analyze candidate performance efficiently. TestInvite offers a streamlined process through the Export Manager, allowing users to export test results in multiple formats, including CSV, HTML, and JSON. This guide explains how to export test results and properly format them in Microsoft Excel if needed.
To begin exporting test results, navigate to the Export Manager within the TestInvite platform. This section allows you to retrieve, filter, and export the relevant candidate data based on your needs.
Before exporting, you can use the search panel at the top to filter candidates based on specific criteria such as:
- Dates: Filter test results within a specified timeframe.
- Group: Export candidates from a specific test group.
- Label: Retrieve candidates marked with specific labels.
- Stage: Select candidates based on their testing progress.
- Rating: Export candidates based on their performance ratings.
Once the filtering criteria are applied, the list of candidates matching your selection will appear in a table. You can choose specific candidates to export or proceed with all retrieved results.
After refining your selection, click the Export Manager button to proceed. Then, follow these steps to export the data:
1. Click the Export button at the top of the table.
2. Choose the file format for the exported data. Available options include:
- CSV: Allows you to specify a delimiter (comma, tab, or semicolon).
- JSON: Ideal for software processing and integrations.
- HTML: Easily viewable in any web browser.
For Excel compatibility, select CSV as the file format and choose a suitable delimiter.
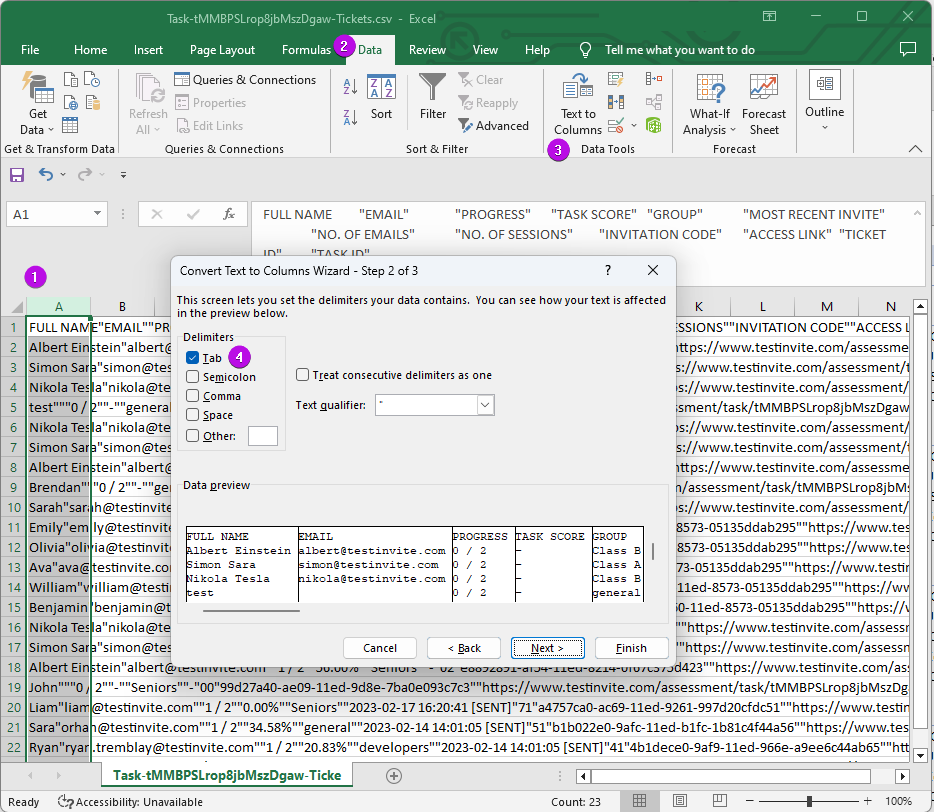
If your exported CSV file does not automatically format into separate columns in Excel, follow these steps:
1. Open the CSV file in Microsoft Excel.
2. Select the first column where all data appears.
3. Navigate to the
4. Choose Delimited as the file type and click Next.
5. Select the delimiter used during export (comma, tab, or semicolon) and click Next.
6. Click Finish, and your data will be properly formatted into separate columns.
By following these steps, you can seamlessly export and format test results from TestInvite into an Excel-friendly CSV file. This process ensures an efficient workflow for data analysis and reporting, enhancing the overall assessment experience.